
Create a Stripe Feed in Gravity Forms 6.x (2026)
A misconfigured Stripe feed in Gravity Forms can send dozens of unwanted receipt emails and cost finance teams hours reconciling payments. 'Create a Stripe Feed in Gravity Forms' is a how-to process that configures Gravity Forms 6.x to forward payment data to Stripe, set feed actions, and prepare receipt routing. This how-to guide shows step-by-step setup, testing payments, fixing common errors (including the 'feed required' error), and routing receipts with our RouteReceipts app. RouteReceipts is our Stripe app that controls which customers receive invoice receipts by managing an allowlist from the Stripe dashboard, avoiding blanket emails without custom webhooks. See Route Receipts documentation for setup notes and troubleshooting. Which single feed setting causes most 'feed required' failures?
What do you need before you create a Stripe feed in Gravity Forms?
Prepare exact plugin versions, Stripe API keys (test and live), a webhook endpoint, and a receipt routing decision (Route Receipts if you plan selective delivery) before you open Gravity Forms settings. These checks stop common setup failures such as missing feed options, webhook verification errors, and duplicate receipts. Complete the five checks below so the feed UI and mapping steps in this guide work as described.
Step 1: Confirm plugin and add-on versions ✅
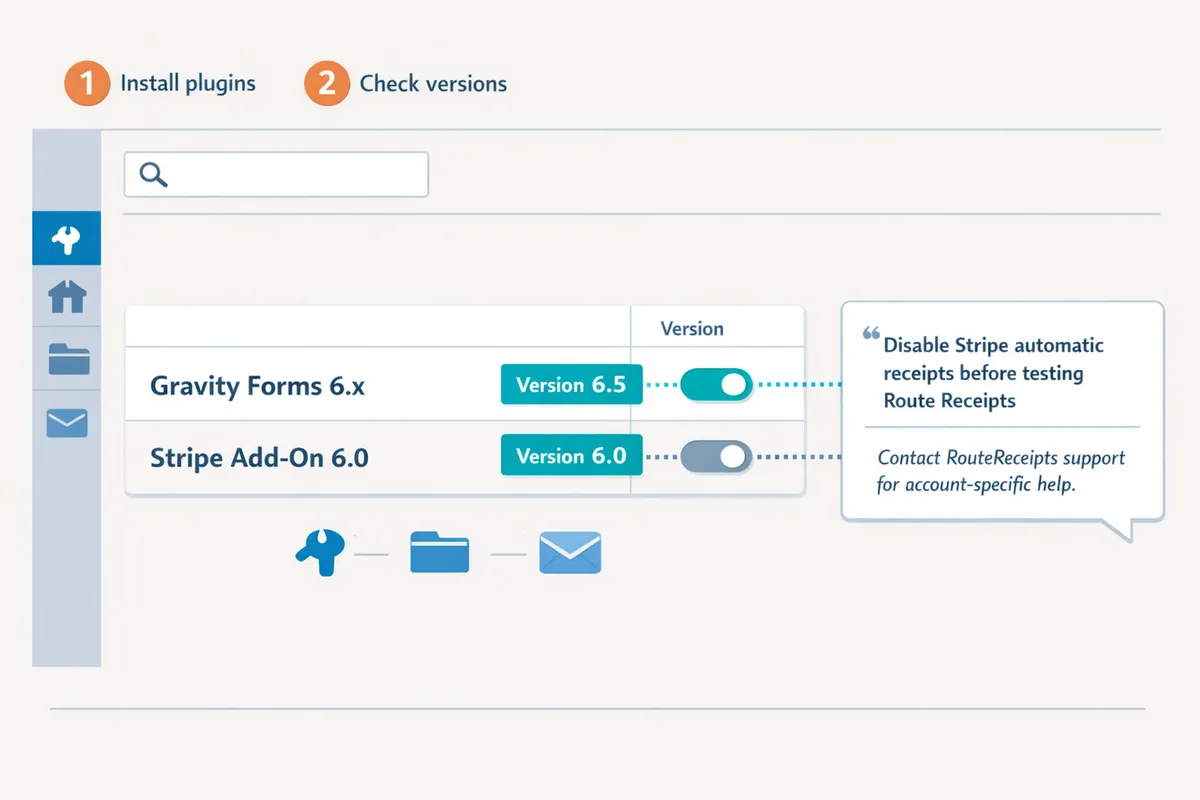
Confirm you're running Gravity Forms 6.x and the Stripe Add-On 6.0 on your site before creating a Stripe feed. Check the WordPress Plugins page and note both Gravity Forms and the Stripe Add-On versions; UI labels and feed options differ between major releases. Expected outcome: your Gravity Forms UI matches the screenshots and options used in this guide. If versions differ, test updates on a staging site first; mismatched versions commonly cause 'feed required' errors or missing Payment Element settings.
Step 2: Prepare Stripe account and API keys 🔑
Prepare both Stripe test and live API keys and paste them into Gravity Forms Stripe settings before you start end-to-end testing or go live. Copy the publishable and secret keys from Stripe Dashboard > Developers > API keys and paste test keys into Gravity Forms for verification; keep live keys at hand for when you switch. Expected outcome: you can create test charges without affecting real cards; switching to live requires replacing keys and toggling the add-on to live. A common mistake is leaving live keys in test mode or vice versa; if that happens, rotate the keys and re-run a test charge.
Step 3: Decide between Payment Element and Checkout 💳
Choose Payment Element for in-form card collection or Checkout for a hosted, redirect-based flow because each option changes field mapping and testing steps. The Payment Element is a Gravity Forms Stripe UI component that accepts card details inside your form, while Checkout is a Stripe-hosted page that handles payment flows off-site. Expected outcome: picking Payment Element keeps customers on your site and requires mapping card-related fields in Gravity Forms; choosing Checkout removes card fields from your form and maps only product and customer data. For a Gravity Forms Stripe payment element tutorial and mapping examples, follow the setup examples later in this guide so you map feed fields correctly for your chosen flow.
Step 4: Enable webhooks and note your webhook endpoint 🔔
Enable a webhook in Stripe and save the webhook endpoint URL and signing secret into Gravity Forms so event validation succeeds. A webhook endpoint is a URL that receives Stripe event notifications (for example, invoice.payment_succeeded or payment_intent.succeeded). Expected outcome: Stripe will post payment events to your site and Gravity Forms will update entry/payment status automatically. If webhook verification fails, re-copy the signing secret from Stripe Dashboard > Developers > Webhooks and ensure your endpoint includes the correct path and receives POSTs; missing events often cause feeds to show incomplete payments.
Step 5: Install Route Receipts in Stripe (optional) 📥
Install Route Receipts if you need selective receipt delivery and disable Stripe automatic receipts to prevent duplicates. Route Receipts is an app that manages which customers receive Stripe receipts using an allowlist and a dashboard-native interface. Expected outcome: receipts are sent only to allowlisted customers and you avoid blanket receipt emails; after installation, create your allowlist and confirm receipt routing with a few test invoices. Follow the Route Receipts documentation for marketplace installation, allowlist setup, and troubleshooting. For a non-technical explanation of selective delivery, see our No‑Code Route Receipts guide, and contact Route Receipts support if you need account-specific help.
💡 Tip: Disable Stripe automatic receipts before testing Route Receipts to avoid duplicate emails and to confirm Route Receipts controls delivery.
For detailed Route Receipts install steps and webhook-driven routing behavior, consult the Route Receipts documentation and the beginner's guide to selective delivery. If you run into permission or webhook issues during setup, the Route Receipts support page lists the account details to include when you open a ticket.
How do you create and configure a Stripe feed in Gravity Forms step by step?
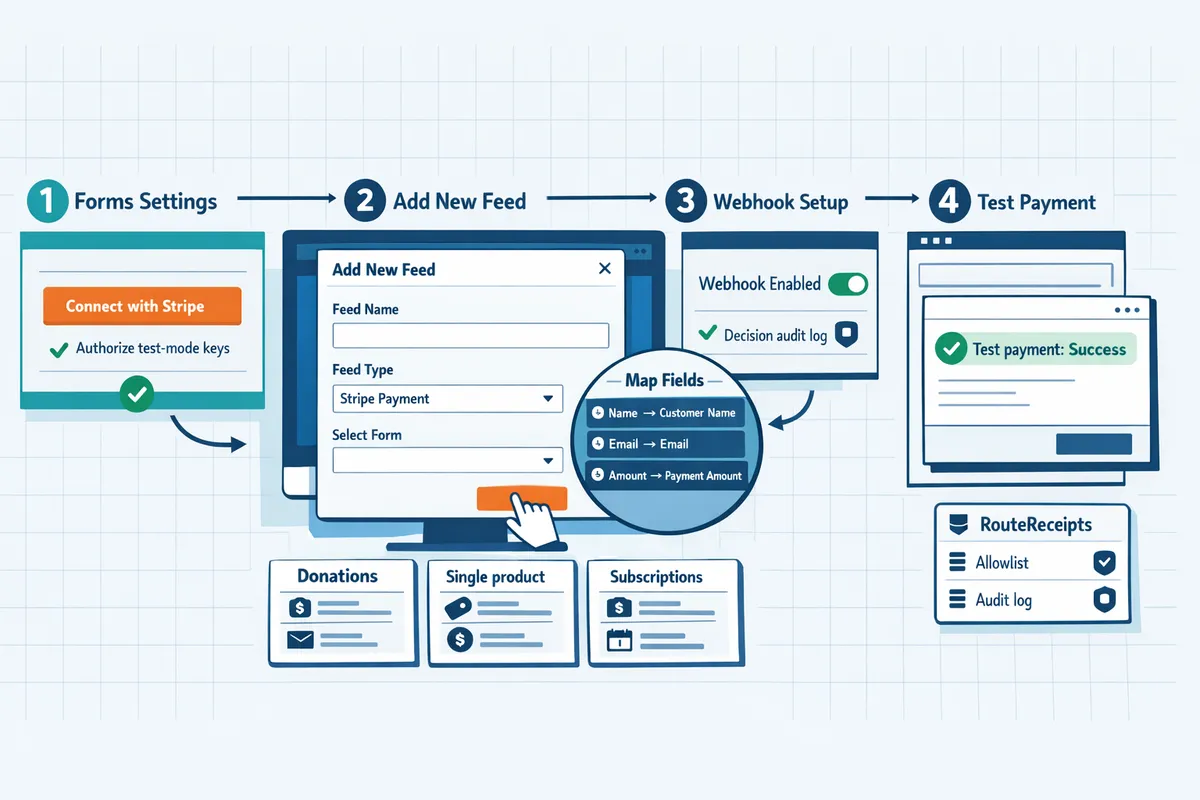
This section walks you through the Gravity Forms 6.x screens to add a Stripe feed, map fields, register webhooks, and run test payments. Follow each numbered step, confirm the expected outcome, and use the mapping templates for donations, single product sales, and subscriptions.
Step 1: Connect your Stripe account in Gravity Forms 🔗
Authorize Gravity Forms to access your Stripe account using the Add-On connection dialog and test-mode API keys.
- Open Forms > Settings > Stripe and choose Connect with Stripe.
- Select Test mode and complete the OAuth flow or paste test API keys when prompted.
- Confirm the Add-On shows a successful connection message and test keys listed under Settings. Expected outcome: the Stripe Add-On reports 'Connected (Test)' and the Add New feed button is enabled. Common failure and recovery: if the connection shows an error, revoke the app in your Stripe account, re-run the OAuth flow, and clear any cached keys in Gravity Forms. For account-specific support include your Stripe account ID and Gravity Forms license when contacting support.
Step 2: Add a new Stripe feed (Settings > Stripe > Add New) ➕
Create a new feed from Forms > Settings > Stripe > Add New and choose the feed type: Charge, Subscription, or Setup Intent.
- Click Add New, give the feed a short name (example: "Donation - One‑time"), and pick Feed Type.
- Set the feed active or add conditional logic so the feed runs only for matching submissions.
- Choose the payment action (charge immediately, authorize only, or create subscription) and set the payment field mapping placeholder if required. Expected outcome: the feed appears in the form's Stripe settings with status Active and the selected Feed Type visible. What can go wrong: a missing required field mapping produces a 'feed required' error on submit; fix this by completing Step 3 mapping before testing.
Step 3: Configure feed settings and map form fields 🧭
Map Gravity Forms fields to Stripe parameters so charges contain correct amounts, customer contact, and searchable metadata.
- In the feed editor, set Amount to the payment-enabled field or calculation field.
- Map Email to the form email field and map Description to a product or purpose field (use short, searchable text).
- Map Customer ID or choose to create a new customer so repeat buyers link to a Stripe customer record.
- Add key metadata fields (for example, order_id, product_sku, or allowlist_id) so you can match customers in Route Receipts and in your finance systems. Expected outcome: the feed saves with no validation errors and the mapped fields appear in the feed summary. Business note: including a stable customer identifier and email in metadata makes it far easier to manage receipts and reconcile payments, which reduces time spent on manual matching.
Step 4: Field mapping templates (donations, single product, subscriptions)
Use these recommended field-to-parameter mappings as starting points for each scenario. Adjust field names to match your form.
| Gravity Forms field | Donations (one-time) | Single product order | Recurring subscription |
|---|---|---|---|
| Amount | Donation amount field → Amount | Product price field → Amount | Initial charge or plan amount → Amount |
| Donor email → Customer email | Buyer email → Customer email | Subscriber email → Customer email | |
| Description | Gift designation → Description | Product name + SKU → Description | Plan name + billing interval → Description |
| Customer ID | (optional) external_id → Customer ID | external_customer_id → Customer ID | external_customer_id → Customer ID |
| Metadata | donation_note, fund_id → metadata | order_id, product_sku → metadata | subscription_id, signup_campaign → metadata |
Expected outcome: copy one template into your feed and verify test transactions match the mapped fields in Stripe and Gravity Forms entries.
Step 5: Configure webhooks and verify events 🔍
Register Gravity Forms' webhook endpoint in the Stripe dashboard and paste the webhook signing secret into the Add-On so event delivery and verification succeed.
- In Gravity Forms Stripe settings, find the webhook URL shown for your site (it appears after connecting).
- In the Stripe dashboard, create a webhook endpoint using that URL and enable events such as payment_intent.succeeded and invoice.payment_failed.
- Copy the endpoint's signing secret from Stripe and paste it into the Gravity Forms Stripe Add-On webhook signing-secret field, then save. Expected outcome: Gravity Forms shows webhook verification success and incoming test events update entry payment status. ⚠️ Warning: Using a test-mode signing secret with live keys (or vice versa) is the most common cause of missed status updates; always register a separate endpoint per mode. For routing receipts with Route Receipts, see the step-by-step install and webhook notes in the Route Receipts documentation for details on how webhook-driven routing delivers receipts.
Step 6: Test transactions and switch modes ▶️
Run payments with Stripe test cards, confirm entries and payment status in Gravity Forms, then switch API keys to live and run a small live transaction to validate end-to-end behavior.
- Submit test payments using Stripe test card numbers and confirm Gravity Forms entries show Paid or Completed.
- Verify Stripe shows matching payment_intent or charge records and the webhook events arrived in Gravity Forms.
- Update the Stripe Add-On to Live mode, paste live API keys, and register a live webhook endpoint and signing secret.
- Process a small real transaction to confirm payment flow and receipt behavior.
Expected outcome: test-mode and live-mode both show matching entries, and the live transaction posts to your accounting flow.
💡 Tip: Follow the switch Gravity Forms Stripe test to live mode checklist: swap API keys, update webhook signing secret, set feeds to active, and run a live charge under $5 to confirm setup before processing higher amounts.
Step 7: Optional—setup multiple feeds and conditional rules 🔁
Use multiple feeds with conditional logic to run different Stripe actions from the same form and avoid creating separate forms for each payment flow.
- Add a second feed and set conditions that match specific product selections, donation types, or account levels.
- Use one feed for immediate charges and another for subscriptions; test each condition path independently.
- Keep a clear naming convention for feeds so finance teams can trace which feed created a given charge. Expected outcome: a single form can handle donations, one-time sales, and subscription signups without duplicate charges when conditions are correct. Business consequence of DIY mistakes: overlapping or contradictory conditions lead to duplicate charges and reconciliation headaches; use clear conditions and test each path to reduce disputes.
Step 8: Integrate receipt routing with Route Receipts 🧾
Route Receipts is a Stripe app that manages which customers get invoice receipts by using an allowlist and a dashboard-native interface.
- Install Route Receipts from the Stripe Marketplace and follow its onboarding to connect to your Stripe account.
- Disable Stripe automatic receipts in Stripe settings so Route Receipts can control delivery.
- Create or import your allowlist of customers in the Route Receipts dashboard using customer email or Stripe customer ID.
- Ensure your Gravity Forms feed maps a stable identifier (email or external_id) so Route Receipts can match incoming payments to allowlist entries. Expected outcome: receipts are sent only to allowlisted customers, and the Route Receipts decision audit log records each routing decision for compliance and troubleshooting. For full steps, troubleshooting tips for missing or duplicate receipts, and plan options, see the Route Receipts documentation and the beginner's guide to selective delivery.
Route Receipts documentation explains install steps and webhook behavior. Read our beginner's guide to selective delivery for a no-code walkthrough on the allowlist and audit log. If you need help, contact Route Receipts support and include your Stripe account ID and a sample transaction ID so the team can assist.
How do you troubleshoot common Stripe feed errors and avoid mistakes?
Diagnose and fix the most frequent Stripe feed failures by checking feed conditions, webhooks and signing secrets, test-vs-live keys, duplicate feed activity, and receipt routing. RouteReceipts' documentation shows how receipt routing can introduce duplicate or missing emails if Stripe automatic receipts remain enabled. Follow the targeted fixes below to recover quickly and avoid lost payments.
Fix the 'Feed required' error ❗
The 'Feed required' error occurs when Gravity Forms expects an active payment feed but no feed matches the submission conditions. Symptom: the form returns a validation error or records a submission without creating a Stripe charge. Root causes include missing feeds, conditional logic that never evaluates true, or feed priority conflicts.
- Check for an active Stripe feed on the form. If none exists, create one using Settings → Stripe → Add New Feed.
- Review feed conditional logic. Temporarily disable conditions to confirm the feed processes a test submission.
- Create a fallback feed with minimal conditions for non-standard submissions so the form always has a matching feed.
- Verify feed order if you use multiple feeds; set the payment feed to the highest priority.
Expected outcome: the submission matches a feed and a single charge is created. This is the primary Gravity Forms Stripe feed required error fix you should test before moving on.
Repair webhook failures and signature mismatches 🛠️
Webhook failures and signature mismatches indicate Stripe cannot reach your site or the signing secret in Gravity Forms is incorrect. Symptom: Stripe shows delivery errors or a 4xx/5xx response in the event log; Gravity Forms does not receive payment events.
- Confirm the webhook endpoint URL in the Stripe dashboard matches the one in Gravity Forms (exact path and HTTPS required).
- Copy the current webhook signing secret from Stripe and paste it into the Gravity Forms Stripe settings. Signing secrets differ between test and live modes.
- If your host blocks external requests, whitelist Stripe IPs or ask hosting support to allow Stripe's webhook traffic.
- Use Stripe's webhook replay feature to resend recent events and confirm Gravity Forms accepts them with a 2xx status.
If replays still fail, consult the RouteReceipts documentation for webhook-driven receipt behavior and follow the endpoint troubleshooting steps in the docs.
Resolve test-to-live mode problems ▶️
Switching from test to live mode fails when test API keys or test webhooks remain configured after the switch. Symptom: live charges fail or appear under test events; webhooks show mismatched signing secrets.
- Replace test publishable and secret keys in Gravity Forms with your live keys under Settings → Stripe before processing real transactions.
- Register a separate live webhook endpoint in Stripe and paste that live signing secret into Gravity Forms.
- Confirm that any third-party integrations (Zapier, CRM plugins) are also switched to live credentials.
- Run a low-risk live transaction or an authorized minimal charge to verify keys and webhooks work.
Search for instructions on how to switch Gravity Forms Stripe from test to live mode in Gravity Forms docs and retest immediately after changing keys.
Stop duplicate charges and mapping mismatches ⚖️
Duplicate charges occur when two systems create payments for the same submission or when form mapping submits the amount twice. Symptom: customers report two charges, or you see duplicate payment entries in Stripe.
- Audit active integrations and feeds. Disable any secondary automation (Zapier, ecommerce plugin) that also creates charges and keep only one active Stripe feed.
- Check field mapping inside the Stripe feed: do not map both a Product field and a custom Amount field to create the same charge twice.
- Use confirmations and redirects to prevent form resubmission retries from triggering the feed again. If your workflow needs resubmits, add an order ID field and guard the feed with a condition that checks for a blank order ID.
- If duplicate protection is necessary, configure Gravity Forms to mark submissions processed after the first successful charge.
Expected outcome: one payment record per submission and predictable mapping from form fields to the Stripe charge.
Receipt delivery issues and RouteReceipts troubleshooting 📬
Receipt delivery issues stem from Stripe automatic receipts being enabled, misconfigured allowlists, or missing audit entries in RouteReceipts. RouteReceipts is a Stripe app that routes invoice receipt emails to an allowlist of customers from the Stripe dashboard.
- Confirm Stripe automatic receipts are disabled before you enable RouteReceipts. This prevents duplicate emails.
- Review your allowlist in the RouteReceipts dashboard and the decision audit log to ensure the customer email or customer ID is included and that the routing decision recorded a send or block.
- If receipts are missing, check for webhook delivery errors that prevented RouteReceipts from receiving the invoice.created or invoice.finalized events and replay those webhooks from Stripe.
- If you see duplicate receipts, check for other systems sending emails and verify Stripe automatic receipts are off.
RouteReceipts' documentation walks through allowlist configuration, audit-log troubleshooting, and plan controls. For a non-technical walkthrough of setup and selective delivery, see the Beginner's Guide to selective delivery. If you cannot resolve missing or duplicate receipt issues after these steps, contact RouteReceipts support with your Stripe account ID and relevant event IDs.
⚠️ Warning: Leaving Stripe automatic receipts enabled while using RouteReceipts causes duplicate emails and customer confusion. Disable automatic receipts before enabling RouteReceipts.
Frequently Asked Questions
This FAQ answers common operational and troubleshooting questions about creating and configuring a Stripe feed in Gravity Forms 6.x. Use it to resolve 'feed required' errors, switch test to live mode, set up the Stripe Payment Element, manage multiple feeds, and control receipts with RouteReceipts.
Why does Gravity Forms say 'feed required'? 🤔
A "feed required" message means Gravity Forms expected an active Stripe feed that matches the submission but did not find one. Check whether the form has at least one active Stripe feed and whether that feed's conditional logic matches the submitted values. Common causes include: the feed is disabled, the feed's conditional rules exclude the current submission, or a field mapping (amount or payment field) is blank. For an immediate fix, enable the correct feed or remove the conditional rule that prevents it from triggering and then run a test submission. For diagnosing harder cases, search for conflicting feeds and test with a minimal form that only includes the amount, email, and payment field to confirm the feed triggers.
How do I switch Gravity Forms Stripe from test to live mode? 🔁
Switching to live mode requires replacing your test API keys with your live keys in Gravity Forms and registering the live webhook endpoint in Stripe. In Gravity Forms go to Stripe Add-On settings, paste the live publishable and secret keys, then in the Stripe dashboard add your live webhook URL and copy its signing secret back into Gravity Forms. Run a small live transaction to confirm entries, webhooks, and receipt behavior; use a real card at a low amount to minimize exposure. Also disable Stripe's automatic receipts if you plan to control receipt delivery with RouteReceipts and then verify receipt behavior with a live charge.
⚠️ Warning: Use a low-value, authorized card transaction when you first go live to avoid large accidental charges.
How do I use the Stripe Payment Element with Gravity Forms? 💳
The Stripe Payment Element is an embeddable payment UI that you enable in the Gravity Forms Add-On settings and map to your form fields. Enable the Payment Element in Gravity Forms Stripe settings, add the Gravity Forms Payment Element field to your form, and map that field to your amount and customer email so Gravity Forms records the payment correctly. Test the integration in test mode using Stripe's test cards to confirm the element collects card details and creates a Stripe PaymentIntent tied to the Gravity Forms entry. For a focused walkthrough, see our Gravity Forms Stripe payment element tutorial steps in the plugin settings and then validate the entry metadata in the Gravity Forms entry detail.
Can I have multiple Stripe feeds on one Gravity Form? 🔀
Yes. You can create multiple Stripe feeds and use Gravity Forms conditional logic to trigger the correct feed per submission. Configure each feed with clear, mutually exclusive conditions so only one feed executes for a payment flow; otherwise you risk duplicate charges or duplicate entries. For scenarios like donations plus product purchases, create separate feeds that check a hidden product-type field and then test each path with the same form. For advanced patterns such as multiple feeds per form or conditional feed activation, document each feed's conditions and run end-to-end tests for every branch.
How does RouteReceipts control which customers get receipts? 🧾
RouteReceipts is a Stripe app that controls receipt delivery by maintaining an allowlist of customers and routing receipts only to those listed. According to RouteReceipts documentation, installation adds a dashboard-native UI where you create an allowlist, disable Stripe's automatic receipts, and let RouteReceipts decide per-charge who receives an email. This prevents sending receipts to customers who do not need them while keeping an audit log of every decision. See the RouteReceipts documentation for step-by-step setup and the beginner's guide to selective delivery for implementation patterns and audit-log examples.
What should I check if webhooks fail after going live? 🔍
If webhooks fail after going live, verify the live webhook endpoint URL in your Stripe dashboard and confirm the signing secret in Gravity Forms matches the one Stripe shows. Also ensure your hosting allows incoming requests from Stripe and that you subscribed to the necessary event types such as payment_intent.succeeded or charge.succeeded. Use Stripe's webhook event replay tool to resend a failed event and inspect the response code in Gravity Forms logs to pinpoint the problem. If you need help beyond these steps, gather your Stripe account ID and recent webhook attempt IDs and contact our Support with those details for faster troubleshooting.
For more on receipt routing and setup options, see the RouteReceipts documentation and our Beginner’s Guide to Selective Delivery in the blog.
For anyone exploring a character design, it is worth considering how details related to beginner costume choices will affect the complete look. With practical wear in mind, it is sensible to balance details related to beginner costume choices with care and storage needs. For choices related to details related to cosplay props, cosplay shoes for conventions can help narrow the options for a specific purpose. Before the preparation is complete, it is useful to check details related to festival costumes against the wearer's own needs.
Next steps let you test the Stripe feed, fix the common errors, and control who receives receipts.
After you create a Stripe feed in Gravity Forms, run a test payment and confirm webhook delivery to ensure your Stripe Payment element works and Gravity Forms records the transaction. Follow the testing checklist to reproduce and resolve the 'feed required' error and to switch Gravity Forms Stripe test to live mode when transactions behave as expected. RouteReceipts is a specialized application that gives businesses selective control over Stripe receipt delivery through a dashboard-managed allowlist, a decision audit log for transparency, and a simple Marketplace install. It prevents sending receipts to every customer and keeps finance teams focused on necessary communications.
Install RouteReceipts next by following our RouteReceipts documentation to disable Stripe’s automatic receipts and create an allowlist so receipts only go to customers who need them. For a no-code implementation walkthrough, see our beginner’s guide to selective delivery. Subscribe to our newsletter for short implementation tips and updates.